- Apr 1, 2023
- 29
- 93
-
Featured
- #1
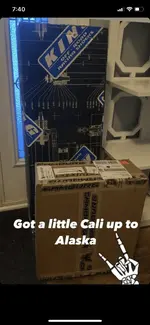
Well, joined a little after I’ve done a few minor things;
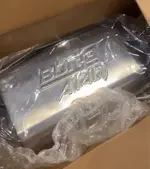
-Borla Attack Muffler single dump in front of the passenger rear wheel (absolutely beastly)
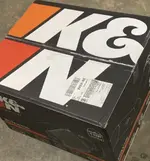
-K&N Black Hawk cold air intake system
-Blacked out Badges for disco points
-Ronin Bullet antenna, cuz ‘murca
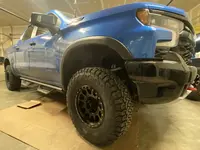
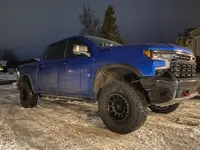
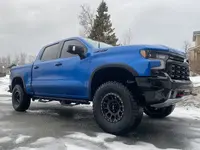
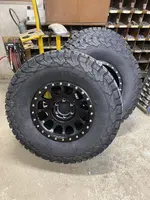
-method 305 17’s 0 offset with BFG AT’s 35x12.5 (hopefully no spacers needed)
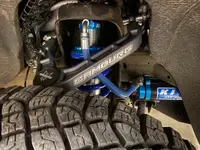
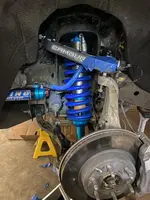
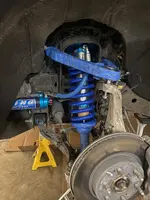
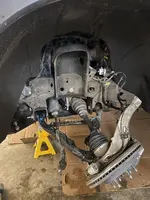
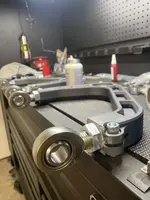
-Camburg KINETIC UCA heim joint and uniball cup (max caster is required when aligning)
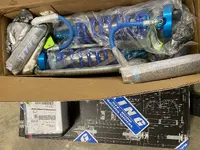
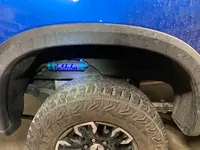
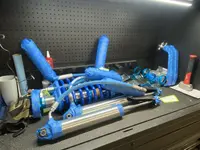
-KING 2.5” shocks all around with compression adjusters on all four reservoirs
-clear bra and ceramic coated, because… well… Alaska.
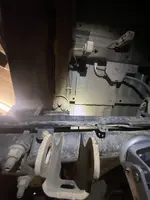
Solo garage install for the UCA’s and shocks took about 8 hours in total. Biggest pain was mounting the reservoirs (there was a factory document inside the frame blocking a hole for the mount… lol)
Everything torqued to spec which probably took the longest, especially to reach the third bolt on top of the front shock buckets…
Tires and wheels will be put together and balanced tomorrow for pick up, and I’ll be bringing it to get the alignment Wednesday.
Have to get the wheels and tires on at the house since the stock set up is this close to rubbing at static height…
Should be all good to go Wednesday and I’m pretty excited to get it going and dial the shocks in!
-Borla Attack Muffler single dump in front of the passenger rear wheel (absolutely beastly)
-K&N Black Hawk cold air intake system
-Blacked out Badges for disco points
-Ronin Bullet antenna, cuz ‘murca
-method 305 17’s 0 offset with BFG AT’s 35x12.5 (hopefully no spacers needed)
-Camburg KINETIC UCA heim joint and uniball cup (max caster is required when aligning)
-KING 2.5” shocks all around with compression adjusters on all four reservoirs
-clear bra and ceramic coated, because… well… Alaska.
Solo garage install for the UCA’s and shocks took about 8 hours in total. Biggest pain was mounting the reservoirs (there was a factory document inside the frame blocking a hole for the mount… lol)
Everything torqued to spec which probably took the longest, especially to reach the third bolt on top of the front shock buckets…
Tires and wheels will be put together and balanced tomorrow for pick up, and I’ll be bringing it to get the alignment Wednesday.
Have to get the wheels and tires on at the house since the stock set up is this
close to rubbing at static height… Should be all good to go Wednesday and I’m pretty excited to get it going and dial the shocks in!
Attachments
-
 6CAFAFA1-80E3-425C-B83B-08E24A3B67B4.webp86.5 KB · Views: 332
 -
 EFC12BE4-5659-4C93-8BAF-4DB42AB14A46.webp50.9 KB · Views: 218
 -
 D8AD71B2-F138-4587-AB83-9570FB3610B9.webp341.7 KB · Views: 186
 -
 3765B24D-E92A-43BF-882D-6A47CF6AA009.webp360.4 KB · Views: 184
 -
 74EBC701-8CBD-45B0-B925-C7C46AA32E6F.webp77.5 KB · Views: 175
 -
 8DDA572B-1FA6-4FE1-AC0B-DE2B5FD646CD.webp51.3 KB · Views: 203


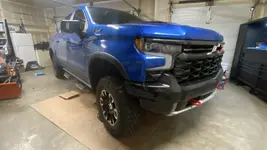


 the fitment is absolutely perfect with the wheel and tire combo. Just a smidge of rub to eliminate too! I don’t understand it, but somehow these kind of things just work out for me… couldn’t be happier with the result